
In windows 10 you get embedded OneDrive with operating system and it’s have own folder for saving all your work and files and sync With other devices. Many time we have question “how can I Change OneDrive’s folder location?”. so if you want to plan to change or move your one drive folder here’s how you can do it
Quick Steps
The process is little long
1. Open OneDrive.
2. Click on Help & Setting and then go to setting.
3. click on account tab and choose unlink this PC.
4.confirm that you want to Unlink your Account.
5.move your One Drive Folder to another location.
6.open again OneDrive and connect it with your Microsoft Account.
7.when it asked for storage location Click on change location..
8.choose new Location for OneDrive’s Folder.
9.confirm your choice and complete OneDrive Setup Wizard.
How to Change OneDrive’s location in windows 10 ?
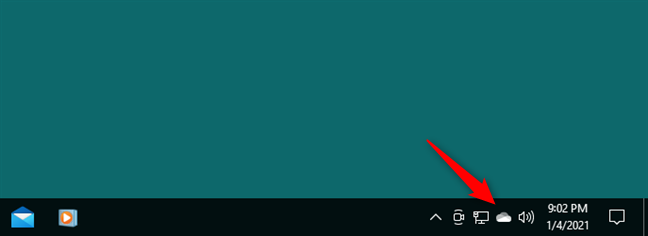
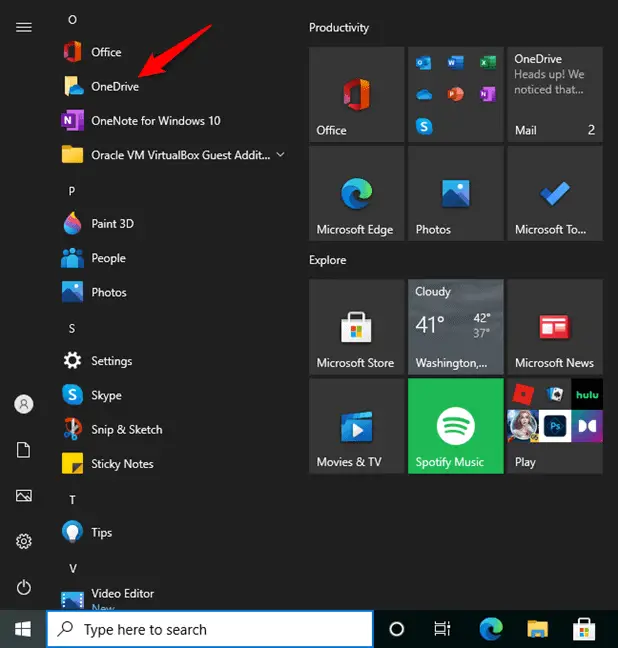
On the right side of the task bar, you should see OneDrive Icon (cloud). click on it, if you can’t find it there so you can go to Start menu and find OneDrive in letter O Section.
The previous action opens a pop-up window with details about OneDrive and these are the last actions taken on your Windows 10 PC. Click or tap the Help and Settings button.
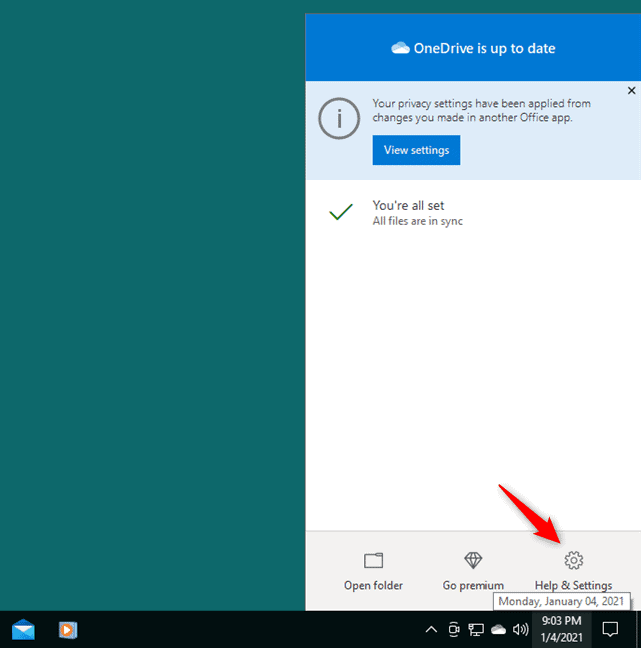
This brings up a menu with various options – select Settings from it.
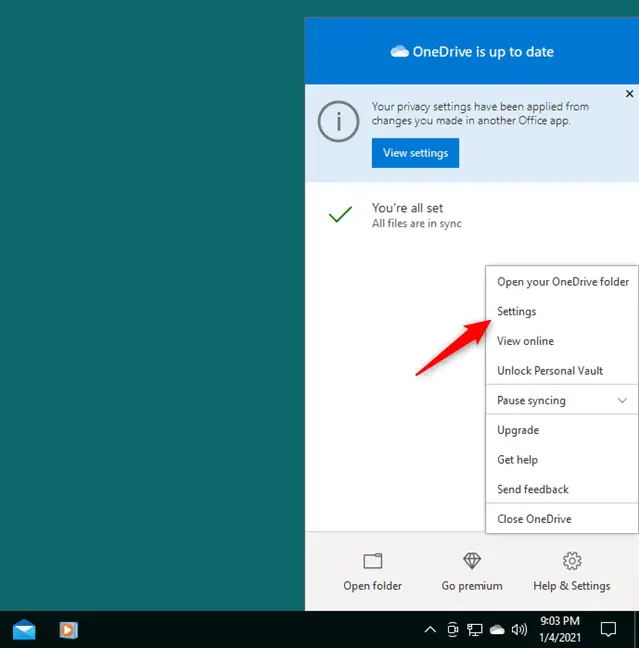
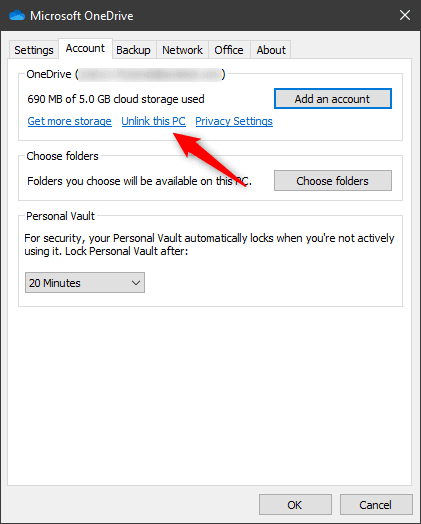
Next, Windows 10 shows you another window called Microsoft OneDrive. In it, select the Account tab, and then click or tap the “Unlink this PC” link.
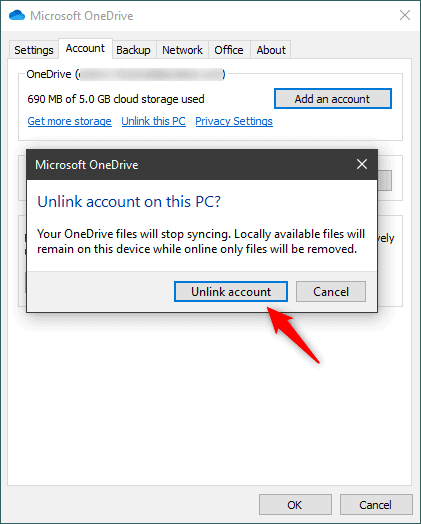
When OneDrive asks you if you’re sure that you want to unlink your PC, confirm the action by pressing the Unlink account button. This makes OneDrive stop syncing your files, and it’s a mandatory step if you want to move the OneDrive folder somewhere else.
Note that, after you confirm this change, you are prompted to log in or create a Microsoft account to use OneDrive on your Windows 10 PC. Ignore it for now, but leave the window open, as you need it later.
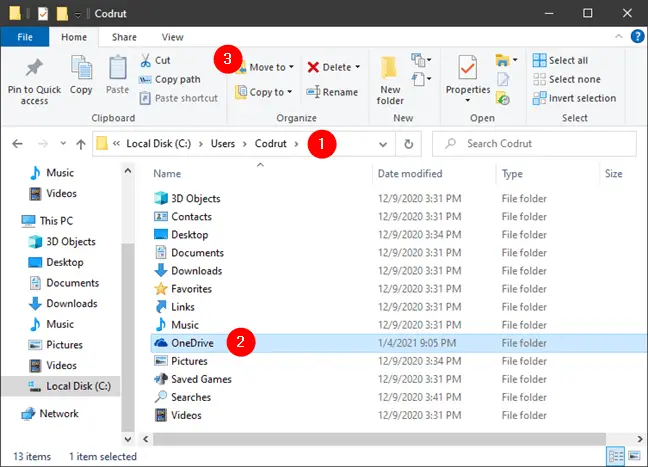
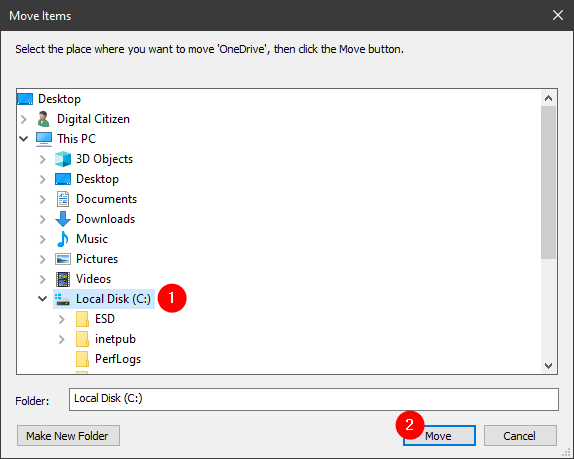
The next step is to move your OneDrive folder from its original location to the one where you want it to be. Open File Explorer and navigate to OneDrive’s current location. By default, that is “C:\Users\Your User Account\OneDrive.” Once you’ve found it, select the OneDrive folder and click or tap on the Move to button from the Home tab in the ribbon interface.
In the Move to list of options, select “Choose location…”.
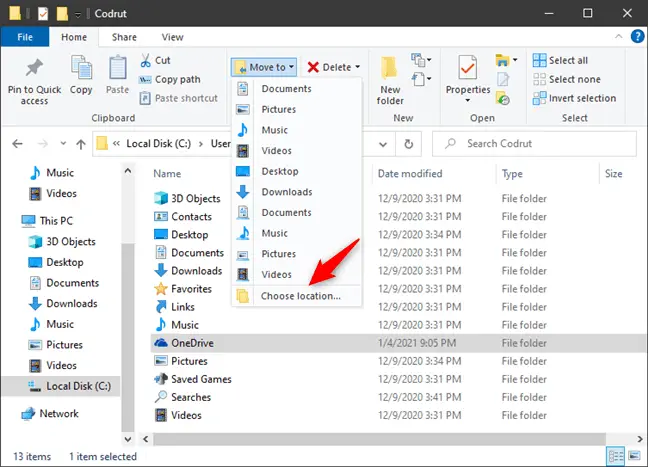
Now browse through your Windows 10 PC and select the drive, partition, or folder where you want to move OneDrive. Once you get there, click or tap on the Move button. Then, wait for Windows 10 to move your OneDrive folder and all the files in it to the new location. Depending on the number and size of your files, this step might take a while.
After Windows 10 finishes moving your OneDrive folder, you can close File Explorer.
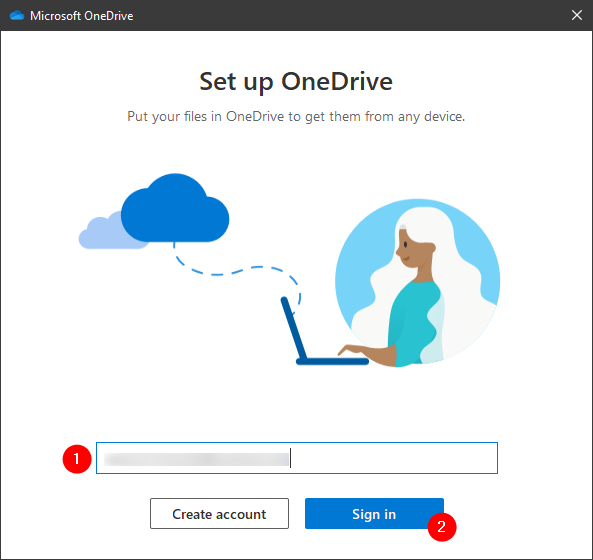
Back to the OneDrive login window, which was left open, enter the email address associated with your Microsoft account. Then, click or tap on Sign in.
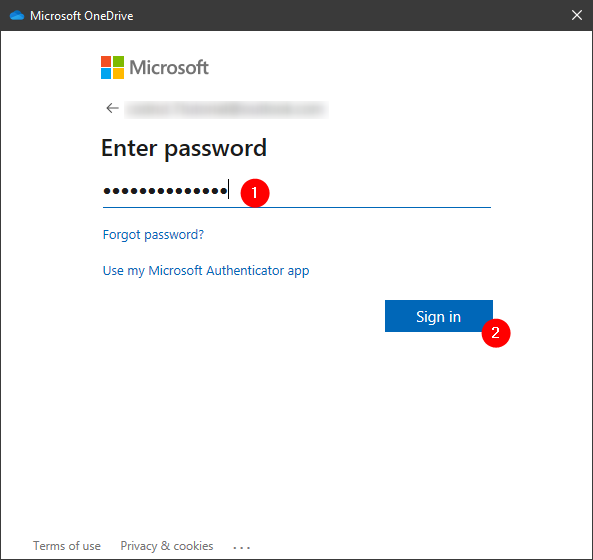
Type your password and press Sign in, or use an alternative way of authentication, such as your Microsoft Authenticator app, to access your Microsoft account.
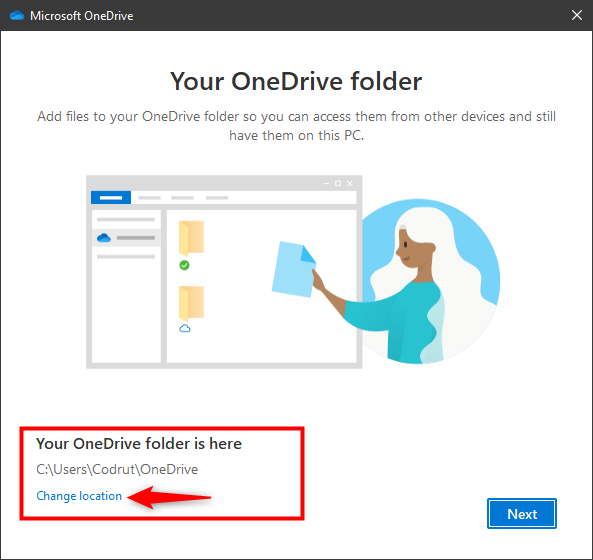
Then, OneDrive shows you where it intends to store your files. As you know by now, by default, that’s “C:\Users\Your User Account\OneDrive.” As you want to use a different location for your OneDrive, click or tap the “Change location” link.
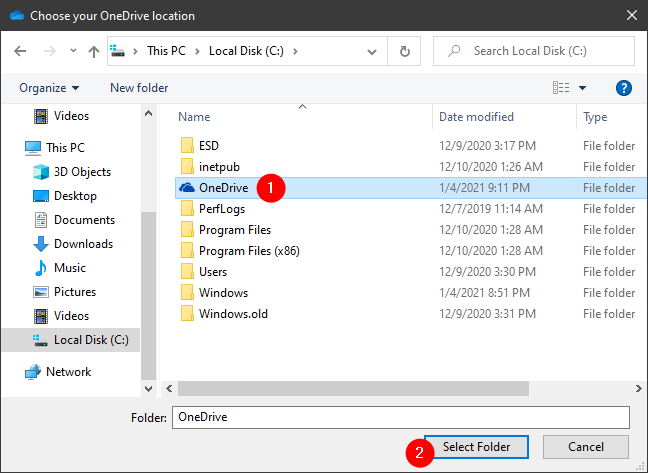
OneDrive now opens a File Explorer window called “Choose your OneDrive location.” Use it to browse through your Windows 10 PC and select the place where you moved your OneDrive folder earlier. Once you’ve done that, push the Select Folder button.
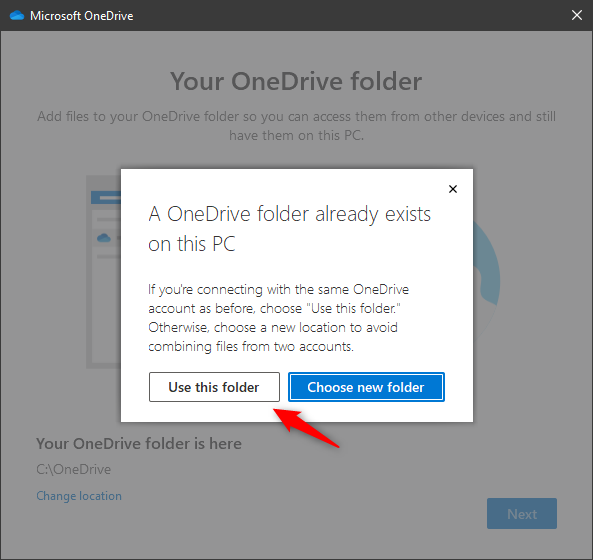
As OneDrive detects that “a OneDrive folder already exists on this PC,” you now have to confirm that you still intend to “Use this folder.”
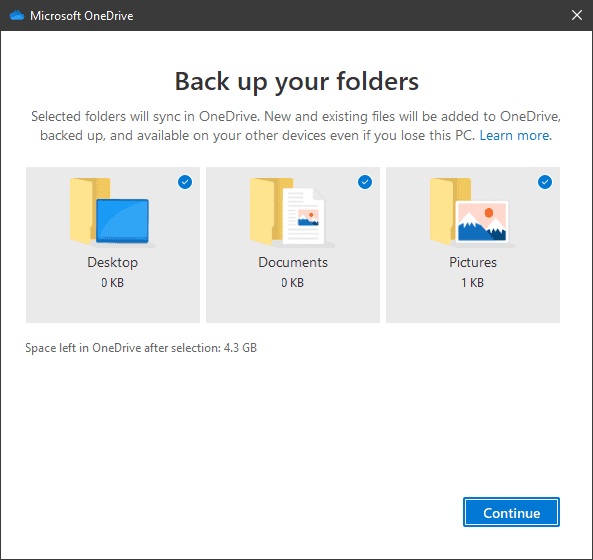
Although the location of your OneDrive folder is now modified, there is still one thing left to configure. That’s to select whether you want to back up your Desktop, Documents, and Pictures folders to OneDrive. Once you’ve done that, click or tap on Continue.
Then, OneDrive shows you a few slides with some information about it and the benefits of upgrading to a paid plan if you’re using the free one. Go through the slides by clicking or tapping the Next button a few times, until you see the last one telling you that “Your OneDrive is ready for you.” Click or tap the “Open my OneDrive folder” and watch File Explorer launch and take you to your new OneDrive location.
That was all: your OneDrive folder is now moved to where you wanted it to be.

Why did you change your OneDrive folder location?
As you’ve seen, changing the location of the OneDrive folder is easy. There are a few steps you need to take, but they’re not complicated. However, it could have been even more straightforward, in our opinion, if Windows 10 provided an option for this purpose in the Settings app. In the end, why did you want to change your OneDrive’s location? Did you move it to another drive to keep it safe? Or did you need more free space on your Windows 10 partition? Let us know in the comments section.