DPI (dots per inch) is a measure of the sensitivity of a computer mouse. The higher the DPI, the longer the onscreen cursor moves on the screen each time we move the mouse.
This is why many people choose to change DPI on a computer mouse. Decreasing DPI can help with fast and precise tasks, like drawing with a mouse. DPI boost is also ideal if you need the mouse to move quickly while playing a game or a few applications.
Many high-end mouse models also include sliders or buttons that allow you to customize the DPI yourself. Some desktop applications also have this option.
However, if your mouse doesn’t have the above features, you can still adjust the DPI through your computer’s settings menu. While this is safe, sometimes it will cause the on-screen pointer to be a bit leggy and inaccurate. This is especially true in cases where you try to force a low-performance mouse to move too quickly.
This way users can apply on versions of Windows from Win XP to Windows 10 with very simple steps.
How to change the DPI of the mouse on Windows 7
Step 1:
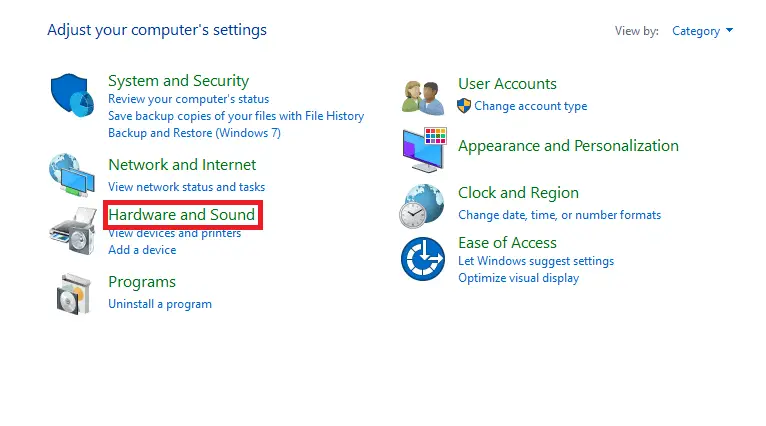
Readers access the Control Panel on the computer and then click on Hardware and Sound .
Step 2:
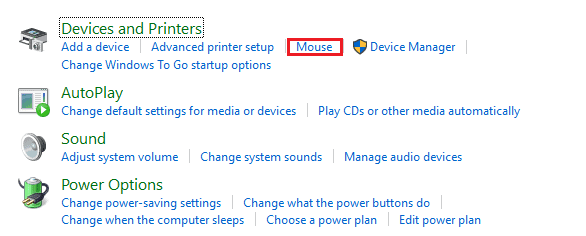
Switch to the new interface in the Devices and Printers section, click on the Mouse section to change the mouse on the system.
Step 3:
Mouse Properties interface appears. Click the Pointer Options tab and then look down at the Motion section , adjust the drag speed in the horizontal bar below. By default, the mouse drag speed will be medium. To speed up the mouse drag when playing the game, you just need to drag the mouse bar towards Fast to finish.
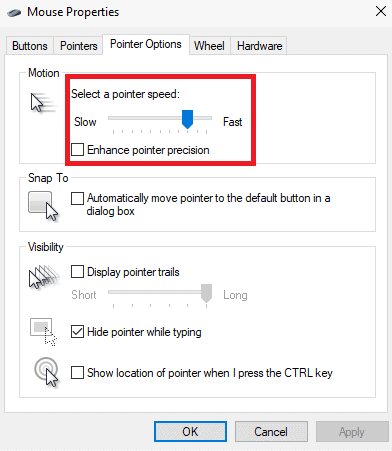
Adjust gradually to fit when playing game, avoid too fast mouse drag. Finally click OK to save the new changes.
In addition, many gamers also encounter slow right-click menu opening. If so, you can refer to the article How to speed up the display of right-click menus on Windows 10 .
How to change the DPI of the mouse on Windows 10
1.Press the Start menu and select the Settings icon .
2. Select the Settings page and click Devices .
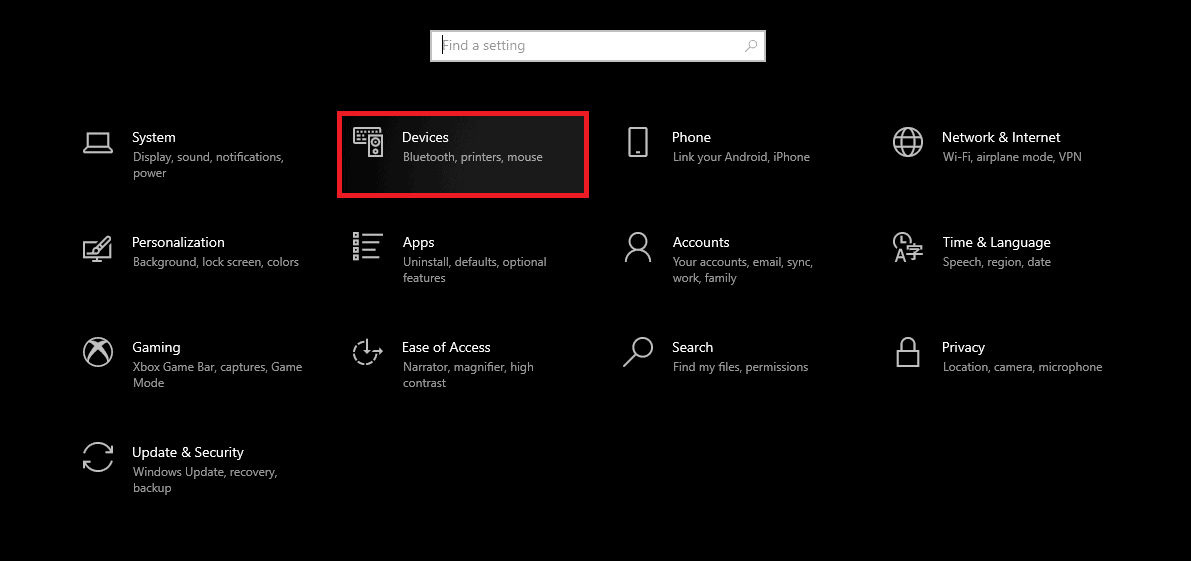
3. On the Devices page , select Mouse .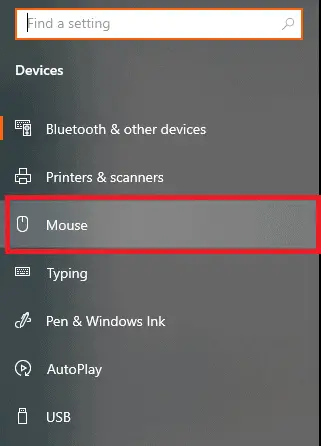
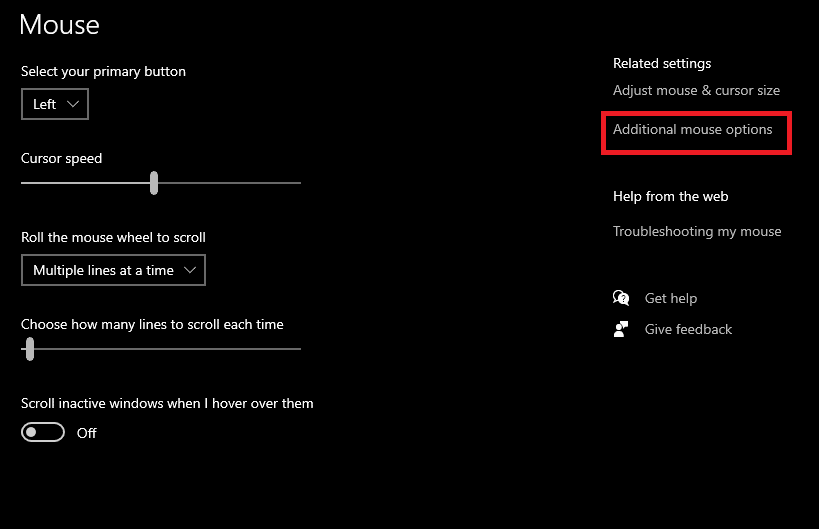
4. On the Mouse page , click Additional mouse options under Related settings .
5. In the Mouse Properties pop-up , select Pointer Options .
6. Use the slider in the Select a pointer speed section to adjust the DPI. Swipe left to decrease DPI and swipe right to increase DPI.
7. When you adjust the slider to the correct speed, select Apply at the bottom. When the Apple button turns gray, meaning there are no more changes to confirm, press the X in the right corner of the screen to close.
How to change the DPI of a mouse on a Mac
1. Open System Preferences . The easiest way is to click on the Apple icon in the upper left corner of the screen, then select System Preferences …
2. In the menu that opens, select Mouse .
3. You will see a lot of sliders and options. The mouse’s DPI control slider is Tracking Speed . Move the slider to the position you want and experiment. When it’s done, just close the window to save it.